0. Django
1. 환경구축
2. 외부파일 사용하기
3. url 연결
4. session
0. Django : 파이썬 웹 제작 프레임워크
model, template, view Pattern의 프로그램 작성
(model, view, controller과 대응)
1. 환경구축
Django 설치
① anaconda prompt 접속 후 명령어 입력
pip install Django==3.1.6
Django 프로젝트 생성
① 명령어 창 사용
anaconda prompt 접속 후 명령어 입력
cd C:\work\psou
django-admin startproject django_ex
explorer창 - import - General - Existing Projects into Workspace - [Brows] 경로 설정, [Copy projects into workspace] Check
서버 실행
cd C:\work\psou\django_ex
python manage.py migrate
type db.sqlite3
python manage.py runserver
서버실행(ip, port설정)
cd C:\work\psou\django_test1
python manage.py runserver 7777
python manage.py runserver 192.168.0.3:7777
server port 변경
C:\anaconda3\Lib\site-packages\django\core\management\commands\runserver.py

default_port = '80'
=> port 번호 변경
서버 종료 : ctrl + c 두번
② 이클립스 사용
- [File] - [New] - [other] - [PyDev Project] - name입력, 3.8 선택, python 선택 - finish
- explorer창 - project 오른쪽 클릭 - Django - Migrate
- explorer창 - project 오른쪽 클릭 - Django - Create application - myapp
- explorer창 - project 오른쪽 클릭 - Run as - PyDev
- http://127.0.0.1:8000/ 접속
2. 외부파일 사용하기
= django_test1
* settings.py : 설정
...

ALLOWED_HOSTS = ['*']

...

INSTALLED_APPS = [
	...

    'myapp',
]

...

STATICFILES_DIRS = (
    os.path.join(BASE_DIR, 'static'),
)
STATICFILES_DIRS = ( os.path.join(BASE_DIR, 'static'), ) : base경로의 static folder의 외부파일 불러올 수 있도록 연결.
* urls.py : 모든 클라이언트의 요청을 받음
from django.contrib import admin
from django.urls import path
from myapp import views

urlpatterns = [
    path('admin/', admin.site.urls),

    path('', views.index),
    path('hello', views.hello_func),
    path('hello_tem', views.hello_template),
    path('world', views.world_func)
]
path('url명', views.메소드명) : 요청명 연결
* views.py : 요청에 대한 기능 구현
from django.shortcuts import render
from django.http.response import HttpResponse

# Create your views here.
def index(request):
    return HttpResponse("기본요청 처리")

def hello_func(request):
    msg = '장고 '
    ss = "<html><body>장고프로젝트 작성 메세지 : %s</body></html>"%msg
    return HttpResponse(ss)

def hello_template(request):
    mymsg = '홍길동'
    return render(request, 'show.html',{'msg':mymsg})

def world_func(request):
    return render(request, 'disp.html')
HttpResponse(응답 메시지) : Http 응답 메시지 send.
render(request, '연결페이지.html', {'key':value, ... }, ... ) : 연결페이지에 dict타입 정보 send
* show.html
<!DOCTYPE html>
<html>
<head>
<meta charset="UTF-8">
<title>Insert title here</title>
</head>
<body>
hi {{msg}} <- 장고의 template 변수 태그
<br>
<a href="world">world 문서</a>
</body>
</html>{{key}} : dict타입 key의 value 값 출력

* disp.html
<!DOCTYPE html>
<html>
<head>
<meta charset="UTF-8">
<title>Insert title here</title>
<link rel='stylesheet' type='text/css' href='/static/css/test.css'>
<script src="https://ajax.googleapis.com/ajax/libs/jquery/3.5.1/jquery.min.js"></script>
<script src="/static/js/test.js"></script>
<script type="text/javascript">
/*
window.onload = function(){
	alert("good");
}
 */
$(document).ready(function(){
	//alert("nice");
	$("#myImg").click(function(){
		abc();
	});
});


</script>
</head>
<body>
<span style="color: #ff0000; font-size: 24px;">성공</span>
<br>
<b>자원관리는 static</b><strong>폴더 </strong>사용
<br>
<img src = "/static/images/pic.png" id="myImg" />
</body>
</html>
* test.js
function abc(){
	alert("test");
	history.back();
}
history.back() : 뒤로가기 수행

3. url 연결
- Function views 방법
- Class-base views 방법
- Including another URL conf 방법
= django_test2
* settings.py
INSTALLED_APPS = [
    'gpapp',
]
* urls.py(django_test2)
from django.contrib import admin
from django.urls import path
from gpapp import views
from gpapp.views import CallView
from django.urls.conf import include

urlpatterns = [
    path('admin/', admin.site.urls),
    path('', views.MainFunc, name='MainFunc'), # Function views 방법
    path('gpapp/callget', CallView.as_view()), # Class-base views 방법
    path('sangpum/', include('gpapp.urls')),   # Including another URLconf 방법

]
path('url명', views.메소드명) : 해당 url이 수신 시 view.py의 해당 메소드 실행.
path('url명', 클래스명.as_view()) : 해당 url 수신 시 해당 클래스 실행.
path('url명', include('application명.urls')) : 해당 url이 포함됨 url 수신 시 해당 application의 urls 파일에서 나머지 url 연결하여 실행.
* views
from django.shortcuts import render
from django.views.generic.base import TemplateView

# Create your views here.
def MainFunc(request):
    return render(request, 'index.html')

class CallView(TemplateView):
    template_name = "callget.html"

def InsertFunc(request):
    #return render(request, "insert.html") # get/post 모두 처리
    if request.method == 'GET':
        print('GET 요청')
        return render(request, "insert.html")
    elif request.method == 'POST':
        print('POST 요청')
        name = request.POST.get("name")
        name = request.POST.["name"]
        return render(request,"list.html", {"name":name})
    else:
        print('요청 에러')

def SelectFunc(request):
    pass

def UpdateFunc(request):
    pass
request.method : 요청의 method를 get한다. ('GET', 'POST', ... )
request.GET.get('key값') : GET 요청에서 key의 value를 get한다.
request.POST.get('key값') : POST 요청에서 key의 value를 get한다.
* index.html
<!DOCTYPE html>
<html>
<head>
<meta charset="UTF-8">
<title>Insert title here</title>
</head>
<body>
두번째 프로젝트 메인화면
<p/>
GET/POST 연습<br>
<a href="/gpapp/callget">callget 파일 요청 (get 방식)</a>
</body>
</html>
* callget.html
<!DOCTYPE html>
<html>
<head>
<meta charset="UTF-8">
<title>Insert title here</title>
</head>
<body>
GET/POST 연습<br>
<a href="/sangpum/insert">자료입력</a><br>
<a href="/sangpum/select">자료보기</a><br>
<a href="/sangpum/update">자료수정</a><br>
</body>
</html>
* urls.py(gpapp)
# 메인 urls가 각 app에 처리 위임
from django.urls import path
from gpapp import views

urlpatterns = [
    path('insert', views.InsertFunc),
    path('select', views.SelectFunc),
    path('update', views.UpdateFunc),
]urls.py(django_test2) -> urls.py(gpapp) -> views.py -> insert.html -> urls.py(django_test2) -> urls.py(gpapp) -> views.py ->list.html
* insert.html
<!DOCTYPE html>
<html>
<head>
<meta charset="UTF-8">
<title>Insert title here</title>
</head>
<body>
자료입력<p/>
<form action="/sangpum/insert" method="post">{% csrf_token %}<!-- 해킹 방지 -->
이름 : <input type="text" name="name">
<input type="submit" value="등록 확인">
</form>
</body>
</html>
{% csrf_token %} : 해킹방지 코드

* list.html
<!DOCTYPE html>
<html>
<head>
<meta charset="UTF-8">
<title>Insert title here</title>
</head>
<body>
결과 출력 : {{name}} {{123}} {{'문자열'}} {#주석#}
</body>
</html>

4. session
= django_test3_session
* settings
INSTALLED_APPS = [
    ...
    'sessionapp'
]
* urls
from django.contrib import admin
from django.urls import path
from sessionapp import views

urlpatterns = [
    path('admin/', admin.site.urls),
    path('', views.mainFunc),       # 1
    path('setos', views.setosFunc), # 2
    path('shows', views.showsFunc), # 3
]
* views
from django.shortcuts import render
from django.http.response import HttpResponseRedirect
# Create your views here.
def mainFunc(request): # 1
return render(request, 'main.html')
def setosFunc(request): # 2
if "favorite_os" in request.GET:
print(request.GET['favorite_os'])
request.session['f_os'] = request.GET["favorite_os"] # f_os 라는 키로 세션에 저장
return HttpResponseRedirect('/shows') # 클라이언트를 통해서 shows 요청을 발생
else:
print('a')
return render(request, 'setos.html')
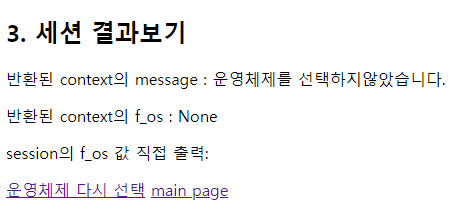
def showsFunc(request): # 3
context = {} # dict type 변수 생성
if "f_os" in request.session:
context['f_os'] = request.session['f_os'] # request.session.get('f_os')
context['message'] = "선택된 운영체제 %s"%request.session['f_os']
else:
context['f_os'] = None
context['message'] = "운영체제를 선택하지않았습니다."
request.session.set_expiry(5); # session 유효 기간 5초 설정
return render(request, 'show.html', context)
HttpResponseRedirect('url명') : 클라이언트를 통해서 url요청명을 send.
=> session
request.session['key'] = value : session에 key값에 value값 set.
value = request.session.get('key값') : session에 key값에 value값 get.
value = request.session['key값'] : session에 key값에 value값 get.
request.session.set_expiry(초) : session 유효 시간 초 단위로 설정.
* main.html
<!DOCTYPE html>
<html>
<head>
<meta charset="UTF-8">
<title>Insert title here</title>
</head>
<body>
메인화면<p/>
session 연습 : 세션이란 일정시간 동안 같은 사용자로 부터 들어오는 여러 가지 요구들을 하나의 상태를 보고 그 상태를 일정하게 유지 시킨 기술.
클라이언트와 서버 사이의 연결이 유지되는 것 처럼 하기 위해 클라이언트의 정보를 서버 컴퓨터의 일정 공간을 확보해 정보를 기억시킬 수 있다.
<br>
<a href="/setos/">운영체제 선택하기</a>
</body>
</html>
* setos.html
<!DOCTYPE html>
<html>
<head>
<meta charset="UTF-8">
<title>Insert title here</title>
</head>
<body>
<h2>2. 세션 이해하기</h2>
<p>운영체제 선택</p>
<a href="/setos?favorite_os=window">윈도우</a><br>
<a href="/setos?favorite_os=mac">mac</a><br>
<a href="/setos?favorite_os=linux">리눅스</a><br>
</body>
</html>
=> url : setos, key : favorite_os, value : window, mac, linux

* show.html
<!DOCTYPE html>
<html>
<head>
<meta charset="UTF-8">
<title>Insert title here</title>
</head>
<body>
<h2>3. 세션 결과보기</h2>
<p>반환된 context의 message : {{message}}</p>
<p>반환된 context의 f_os : {{f_os}}</p>
<p>session의 f_os 값 직접 출력: {{request.session.f_os}}</p>
<a href="/setos">운영체제 다시 선택</a>
<a href="/">main page</a>
</body>
</html>
'BACK END > Django' 카테고리의 다른 글
| [Django] 장고 정리 3 - Ajax, Ajax + DB, Join (0) | 2021.02.22 |
|---|---|
| [Django] 장고 정리 2 - sqlite, where, group by, 원격 DB, Foreign Key, CRUD, 페이징, 게시판 (0) | 2021.02.22 |